Neil's Norton Notes |
Neil’s
Notes.
I’ve been a Norton fan since the Spring of 74 and by the Autumn of the same year I had a Norton of my own. The Nortons that grabbed my attention when I started motorcycling on an Ariel Leader in early 74 were Commandos. However, my first Norton was a 1955 19S 600cc Single, complete with white single adult Watsonian sidecar. HHL 275 where are you?
If I ever complete my book ‘My Life on Two Wheels’ then you can read more about this machine and me.
Since those early days, I have come to adore all Norton products, although my experience so far is with regard to twins and side valve / OHV singles.
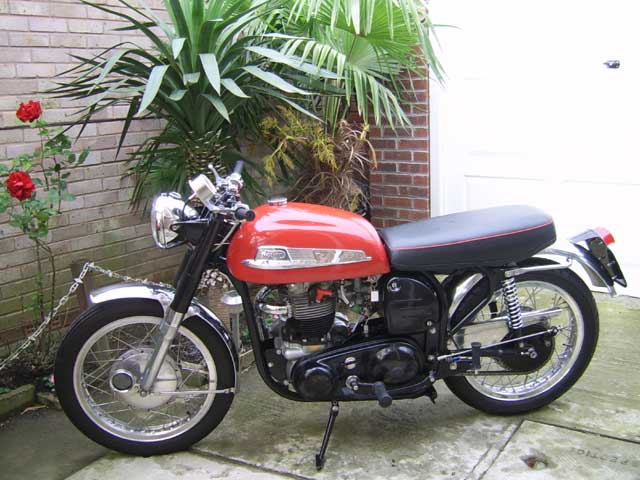
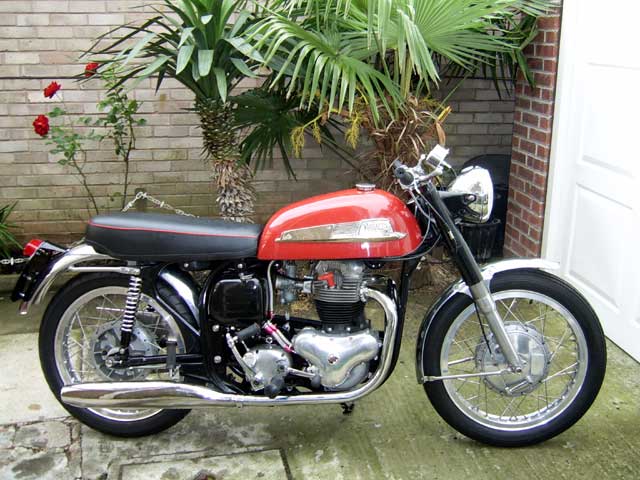
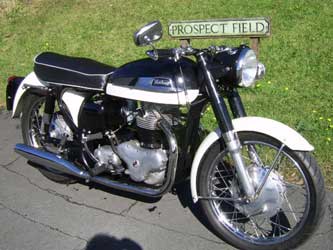
1960 Norton Dominator 99
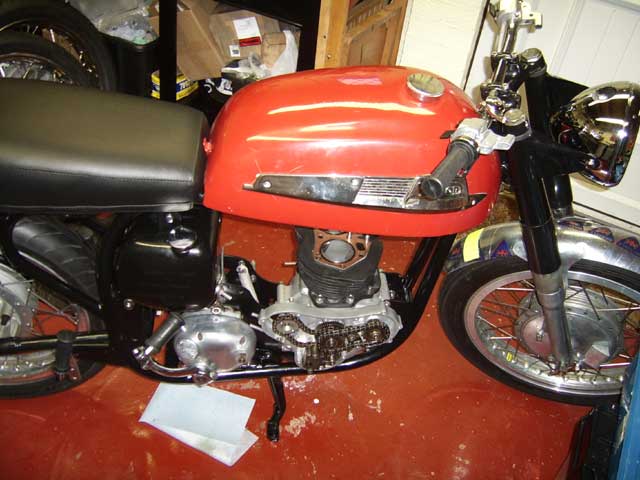
Well, the 650 is on the road but not quite finished. There is a small leak coming from the top of the petrol tap, it looks like and there is a charging problem. With an assimilator red lamp fitted to supplement the Ammeter it is clear that with no lights on, that 50 mph + must be achieved in top gear before charge gets to the battery. Turn the headlamp on and it is well into discharge territory. Sounds like another stator is required. As a result the tank can wait until next year now.
The 99 was an original bike (Matching engine and frame numbers) I bought back in May 2010, spending its life in North East England. I have the green continuation log book and the last tax disc. (1975) The lady at the DVLA tells me that I should be able to retain the original registration number once restoration is completed. I just hope in the meantime they have not sold it.
I’m dead against selling registration numbers from running or restorable vehicles; they are a part of a machines history and a key reference point for identification. Unfortunately there is big money to be made from selling numbers, the DVLA are a part of the problem, except where they sell a previously unused number to be used on a new or created vehicle.
Many a slide show at our VMCC meetings we can identify a machine and owner by its registration number. Without that number it just becomes another vehicle.
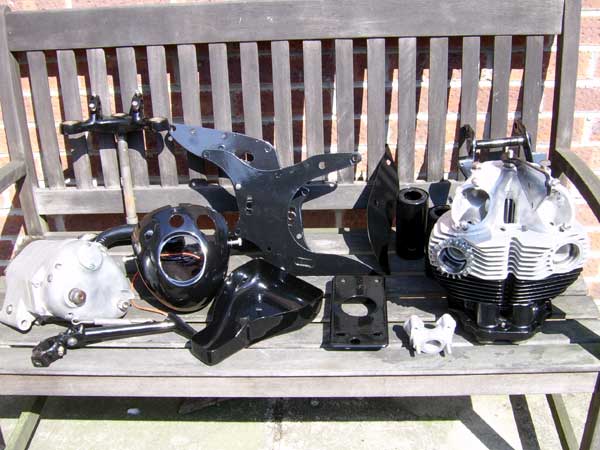
So, the 99 was not complete when I bought it and I have spent these past couple of years collecting the harder to find original bits while I got on with the non original 650.
The bike came with a non fitted single racing seat, clipon’s and a crude rear set arrangement. There was a rusty chrome headlamp but no mudguards.
On the plus side with this boy racer there were a couple of John Tickle items; Manx type front mudguard brackets (Now on the 650) and headlamp brackets. Also it looks like the fork slider pinch bolt area has not been welded, quite rare these days unless upgrading to the stronger Commando design. The only welding to do on the frame is the crossbar brackets missing on the rear sub frame. It is common to see these missing to accommodate racing seats but they are important to prevent flex in the rear of the frame.
The hardest bit I had to collect was the headlamp console that contains the Smiths Chrono Speedometer, the ignition switch and the Ammeter. It is not perfect but the metal is solid and I think this will be a job for the paint shop. I have a good front mudguard which is about right for the year but if not, easily changed with the correct one if available. I understand rear mudguards are now remanufactured so I’ll buy that nearer the time. Since this will be, to the best of my ability an original machine with the exception of stainless fasteners and 12 volt electrics. I’m also on the lookout for an original Lucas tail light although pattern parts are available so it won’t hold me up.
For 1960 on the 99 there was a choice of magneto or coil ignition. The bike came with a magneto but I managed to buy a distributor so I’ll go with that. It appears that the colour schemes for the year were blue or black and dove grey. I’m going with the latter.
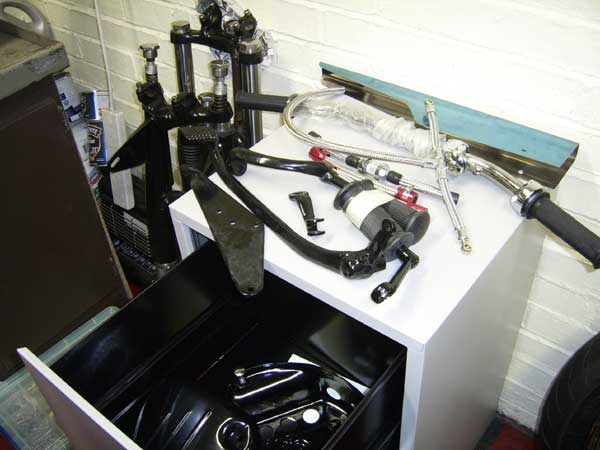
At the time of writing I just have the rear wheel, swinging arm, front wheel and forks to dismantle. I have a bunch of small items ready for my local powder coaters, this includes a solid metal tool tray, which means I have a spare fibreglass copy to spare. Also for powder coating is the new original spec side stand bought from RGM but somehow I think I’ll paint that by hand.
To help with the engine rebuild I have bought the Mick Hemmings DVD although the Late John Hudson version would have been good too.
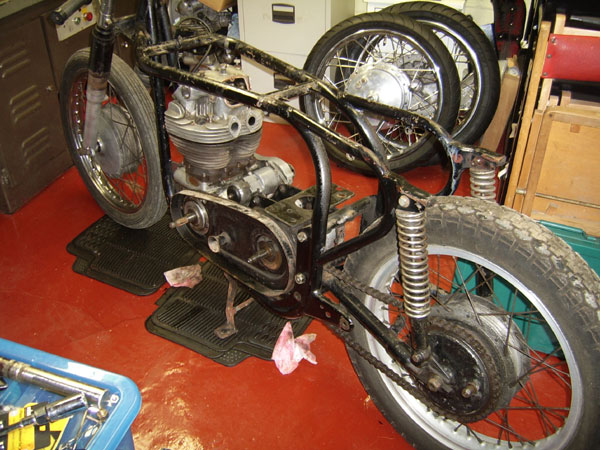
1960 Norton Dominator 99 (600cc) Part 2
I’ll bring the 650ss to conclusion when I conclude the Dominator 99. The Spring of 2013 was a record cold one here in the UK and not the sort of climate to make one enthusiastic about handling cold metal! Cold steel Corporal Jones, they don’t like it……
Most of the time since the last update has been spent buying new parts (Mostly from RGM Motors in Cumbria) and where possible, striping down and preparing parts for powder coating. These parts, all gloss black include the slimline frame, the headlamp shell assembly, (I went for powder coating after all) the swinging arm, the chain guard, engine plates, side stand (Decided on coating after all) the centre stand and so on.
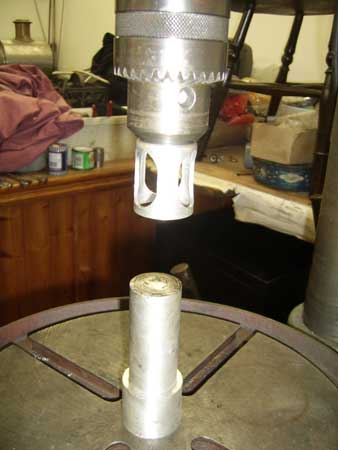
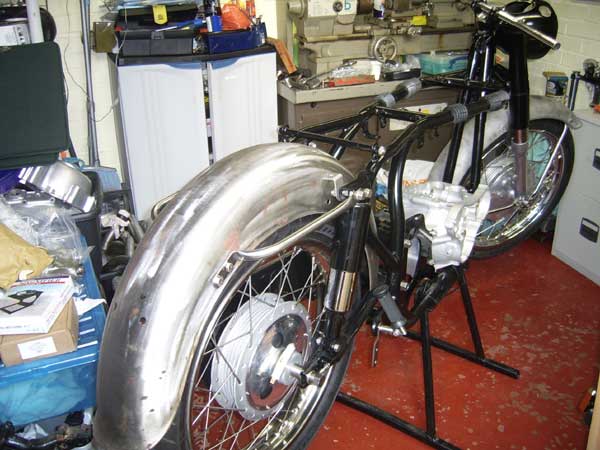
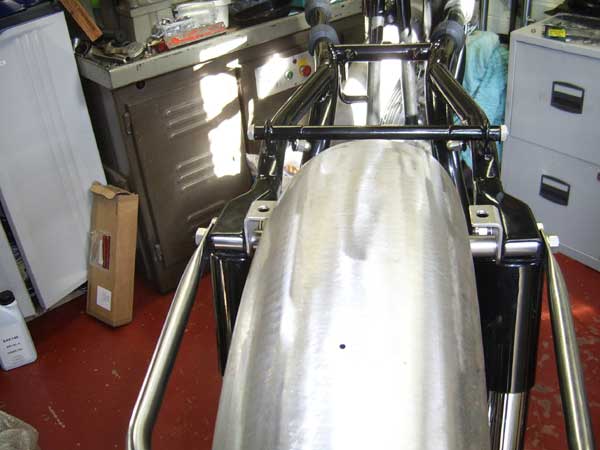
I’m so pleased with the finish of the powder coating that I’m looking at having both mudguards powder coated Dove Grey for a more durable finish, if they can match the colour. (Yorvik Engineering Services 01904 768515) This reminds me; I managed to obtain a British made rear slimline mudguard from the Norton Owners club. It was in bare metal and quite expensive but it appears to be correct with the holes in the right places and strengthening strips at the grab handle mounting points. I will do a trial fit first of course but I think the only thing to do is to rivet on a plate with a captive nut where the rear of the seat is secured.
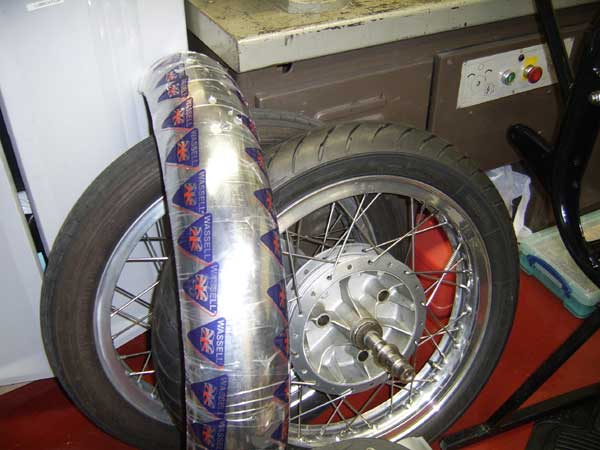
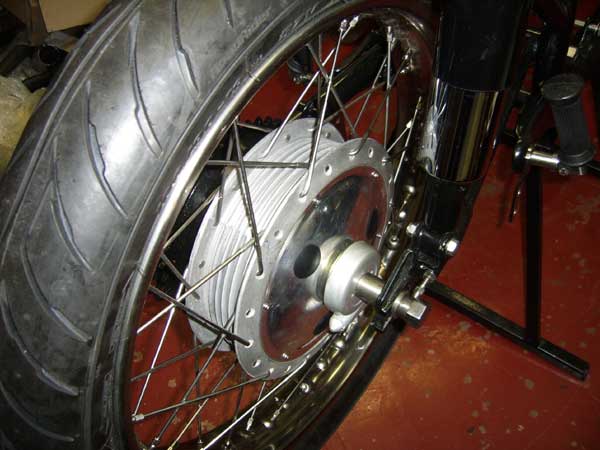
The wheels were built last year by Ian, a good mate of mine, the other deviations from standard are the stainless rims and spokes but also the modern Avon tyres. British bike, British rider and British tyres…Heaven and street cred!
As I write, I have the perfectly powder coated frame on a stand and have used a round file in order to take out just enough coating so that the various spindles and bolts can pass through. I’ll have to do the same with the engine plates too. This preparation saves a lot of grief when it comes to final assembly time. One lesson I learned from the 650ss is to make sure all studs and fixings are in place including to the engine plates before the engine is heaved into the frame.
The forks will be rebuilt using the original dampers and springs as they look to be in perfect order, though new stanchions, oil seals and bushes will be used along with new stainless fork seal holders. As usual, these needed some work on the threads. (20tpi)
I’ll be using taper bearings for the steering, a bit of a pain to adjust, perhaps each 5+ years but should pretty much last the duration. I have found that 200cc’s of fork oil in each leg works really well, better than what the book says (150cc) I’m going with 15 grade fork oil, a bit thick by modern standards but these are not modern forks.
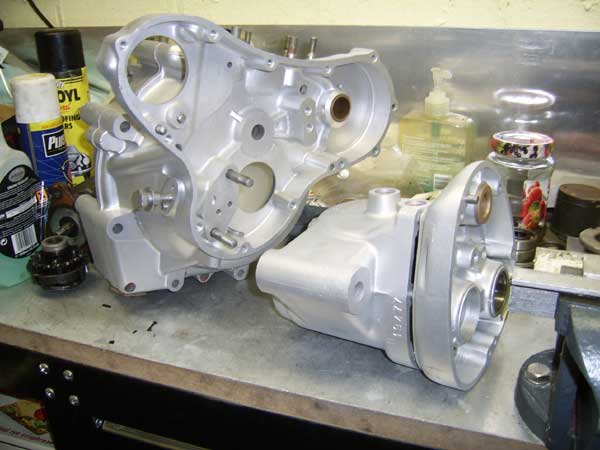
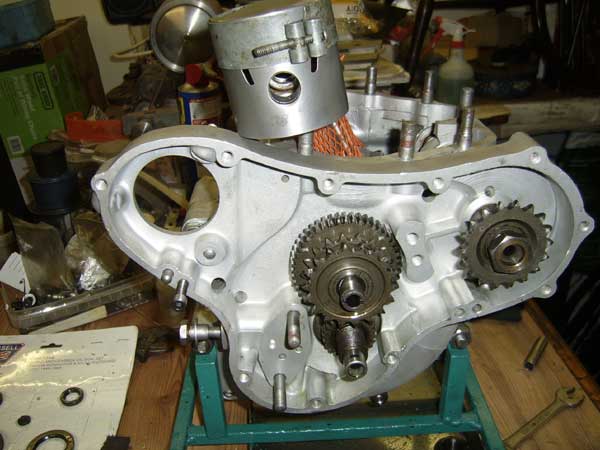
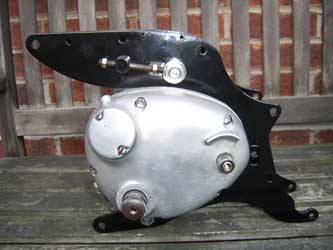
The gearbox was found to be in excellent order and was rebuilt using an RGM overhaul kit, including a superblend layshaft bearing, recommended for Norton AMC boxes working with engines over 500cc. I always use EP 90 in the gearboxes without issue and Castrol still make this grade. (140 grade in a 16H Dolls Head box)
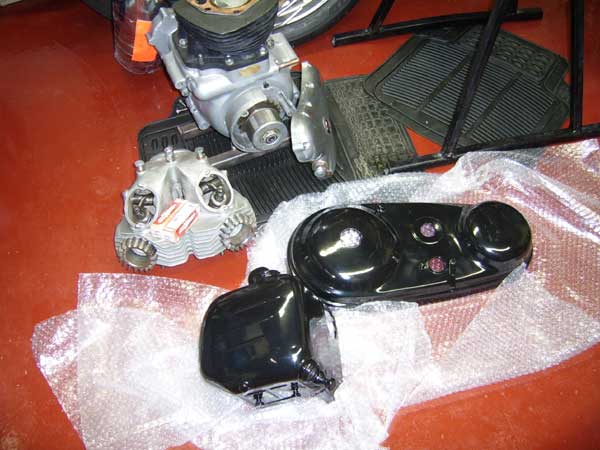
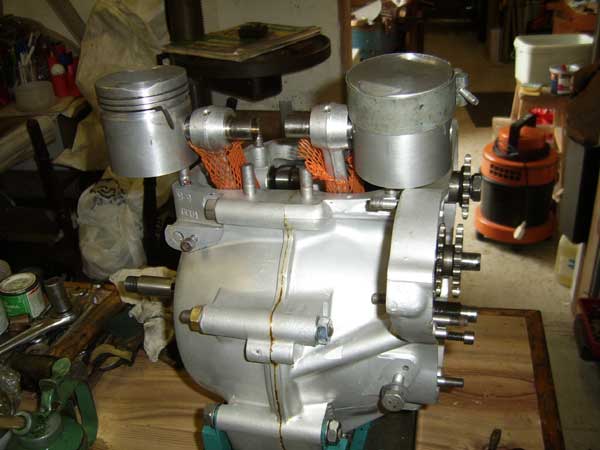
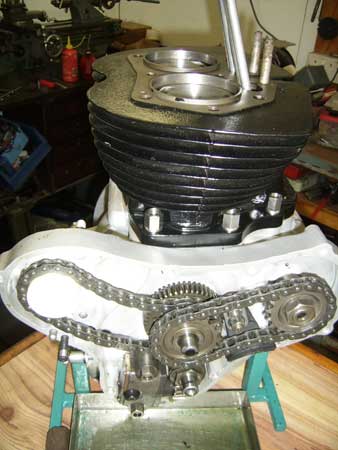
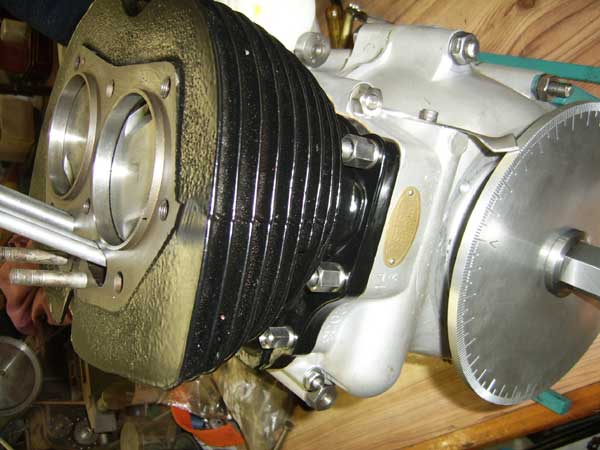
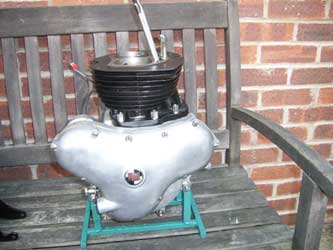
As for the motor, it is on standard bore, although I had to work on the lip at the top of the stroke, the original pistons will be reused with new rings. The barrel is now back from being powder coated. (Satin Black)
The bike came with two cylinder heads and sods law turned out that the one on the bike and rebuilt was a pre 1960 head. Thankfully, I asked Les Wilde to vapour blast both heads so that one will now have to be built to make it right although they are interchangeable. (Until about 1964)
The bottom end was interesting in that it was in excellent order. New STD big end shells will be fitted as well as new rod bolts and nuts but believe it or not, on a motor not run since 1975, the main bearings were found to be perfect and will be reused. As always with these motors without an external filter, I run on Millers non detergent straight 40, although semi detergent is fine for the initial running in period of a clean rebuilt engine.
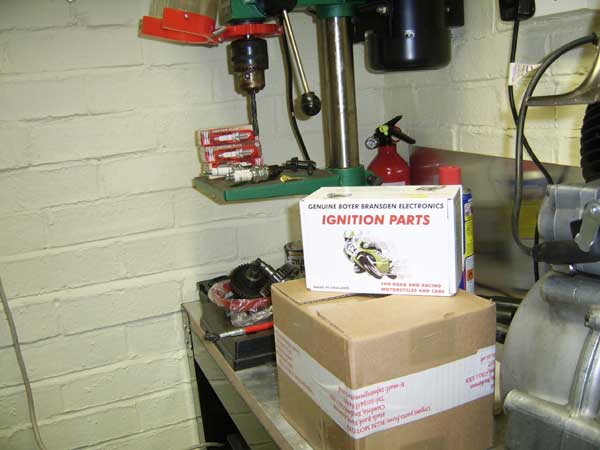
As for the electrics: I came to a decision about the ignition. The system was always going to be up rated to 12 volts but now I have decided to put an electronic ignition inside a magneto housing I have. Therefore I may as well hide a Boyer power box too. These really are magic boxes that incorporate a capacitor, so flat battery’ or dead battery is no issue, the same goes for a blown fuse.
I have a genuine Lucas headlamp and Chris Knight Motorcycles provided me with a genuine Lucas tail light. Champion N5C plugs are purchased ready for the cylinder head.
(N4 in the 650)So, there we are, just the motor to put together and we will be all ready for re-assembly. That reminds me, I need to buy a complete exhaust system, plus the front mudguard stays. Just when you think you have it all another shopping list emerges! But will it be on the road during Summer 2013?
Watch this space! Neil


1960 Norton Dominator 99 (600cc) Part 3
Well, progress was indeed slow. Remember, youth is a flame we burn and what you borrow you must return! There were more parts to buy for the 99 than I thought I had to and that included left and right footrests and a front mudguard. The front mudguard I had was from an earlier model. I’m hoping Fred Williams will make me one. I could of course use the earlier mudguard but in this case I’m trying to make an original machine and with the cost of powder coating it will be best to do it once and do it right. The old mudguard will not be wasted; it can be used on a pre Featherbed Model 50 project, if I ever get any engine plates. After five years I’m getting a bit fed up with that issue!
I’ll come back to the 99 progress in the next paragraph but for now I should update what has been happening, bike wise elsewhere. Some time of course has been spent riding. I try to ride to local events to take photos for the Journal and this Web site. The way this Ethanol business is going, riding an old Norton as we know it will be history before too long. Anyway, the 650 had a charging issue. That is now fixed. There were two problems, one is I fitted a Wipac rotor, which was slightly too small, the correct size Lucas rotor fixed that problem. The other issue took a bit longer to solve, turned out to be a bullet connector came undone. Once sorted I found that the engine kept running when the ignition was turned off. The problem was in the ignition switch wiring. Thanks to the NOC electrical guru, Al Osborne for explaining the cure. I did mention a slight fuel leak around the fuel tap area. I decided to have the red tank taken to bare metal at Yorvik Engineering. I found that there had been a bit of filler in the top right hand side but the metal was all sound. So I filled it to a reasonable standard and used some high build primer, clearly not enough and had it sprayed MG red, so I can touch it up. It looks good as long as you don’t look too close. Finally, riding the 650 is very good, almost the performance of the 850 Commando without the weight. However, there is a problem, there is a lot of knocking noise and I fear it may be the big end. Clearly there is something wrong. The motor was bought as rebuilt, so I’ve not looked down below myself. When the 99 is finished the next job will be to take out the engine and find where the noise is coming from. At this opportunity I will also change the gearbox for a rebuilt unit with the updated layshaft superblend.. It will be interesting to find where the noise is coming from.
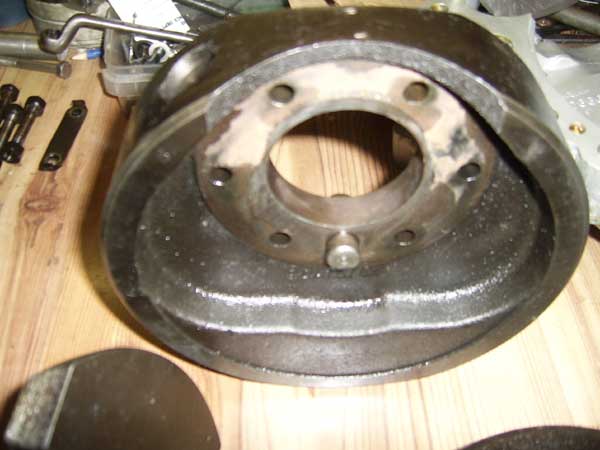
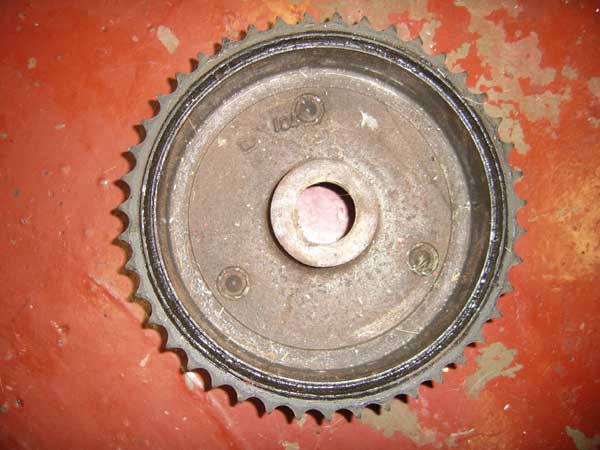
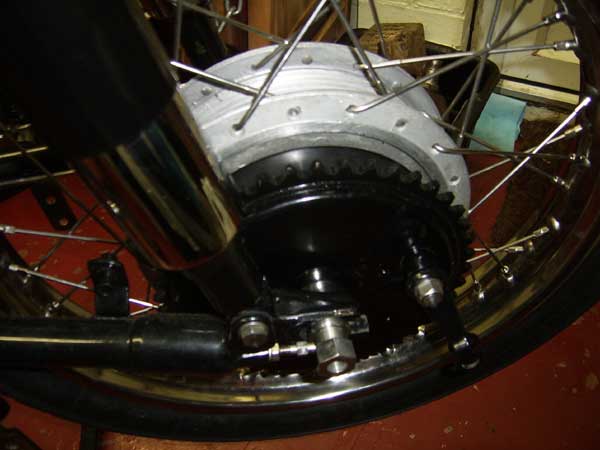
So, back to the 99. As said, there are still a few more parts to buy, including a complete exhaust system and a new monobloc Amal but these I can buy nearer the time of fitting them. Fitting the back wheel caused a couple of issues to surface. First I found that where the three studs are fixed to the sprocket/ drum on the new reproduction item inside the drum, the weld fixing the studs were proud. On the original sprocket the fixing points were recessed. The problem is that they slightly catch as the wheel turns, something to look out for in future and a job for a small hand grinder to fix.
The long right hand stainless wheel spacer (Stainless where possible is a deviation from standard) proved to be about 16th” longer than the original and would not fit in the swinging arm with the top hat spacer fitted. The excess material was removed and with the top hat spacer inverted cured the problem.
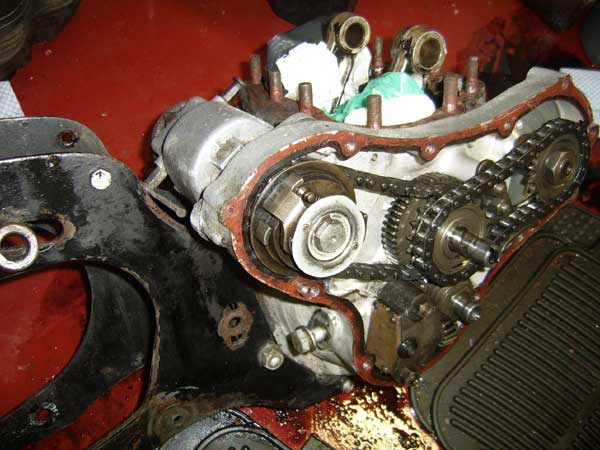
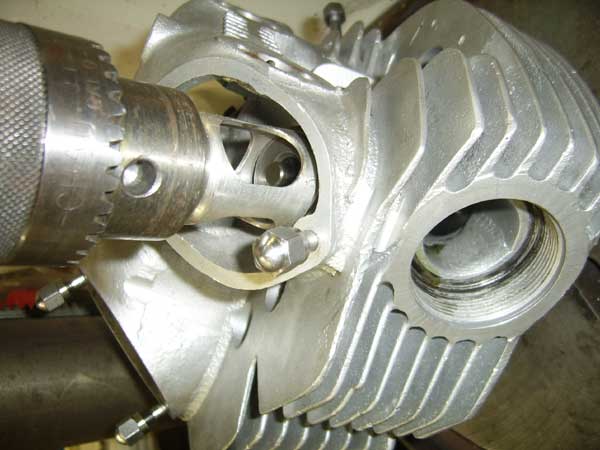
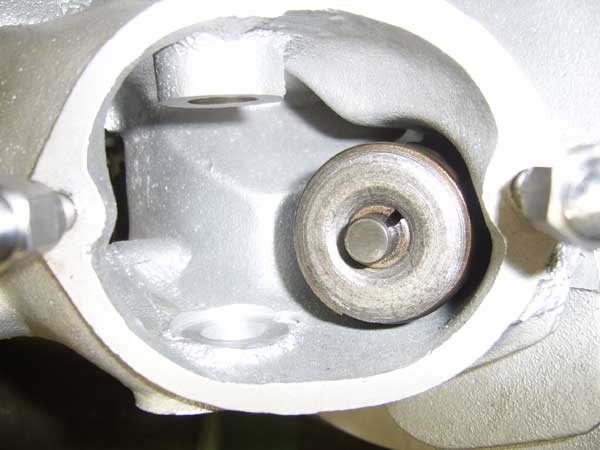
I’m hoping to obtain some Hepolite rings. I have some Italian GM rings as a standby. The cylinder head has been vapor blasted but needs rebuilding and will have new valves, guides and springs, also the new RGM rocker spindle fixing kit, again a deviation from standard. The bottom end was totally dismantled and cleared of the tiny amount of sludge remaining and rebuilt using a new set of six studs. New shells were fitted to the rods but the main bearings were, after close examination found to be in excellent order and reused as stated in part 2.. The cases were sealed with yellow Wellseal, as recommended in the Mick Hemmings DVD. Also the clutch is ready to be fitted as soon as the inner primary chain case goes on.
Next time we should be looking at something that looks like a motorcycle. While not getting anywhere near for summer 2013, Summer 2014 is a viable target. With the local DVLA office now closed, Swansea tell me that registration can still be completed locally and through the post. Just as well as the registration plate has been made. However, I have the last tax disc from 1975 and the continuation green log book. With matching numbers all should be well. We’ll see.
1960 Norton Dominator 99 (600cc) Part 4
Well it’s mid April ( 2014) and with a bit to report; I’m making this project a five part update.
The 650’s motor still has to be taken apart to find out where the knocking is coming from, (See above project) but that won’t happen until the 99 is finished. Having two machines apart at the same time with similarities is a recipe for a mix up.
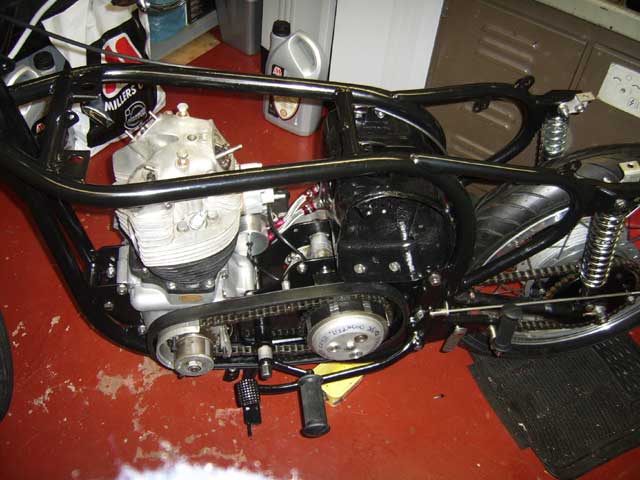
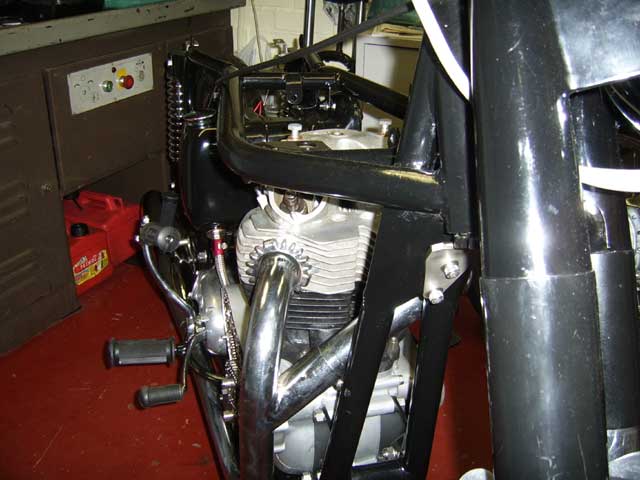
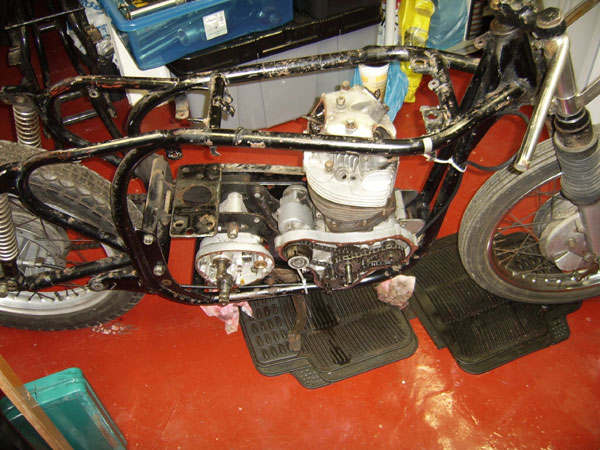
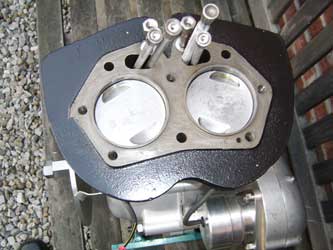
I’m aiming for the end of July to have the 99 completed, ready for my annual August ride to Whitby. As you can see by the photo’s; the engine is rebuilt, note the new timing side chains but I need to purchase the ignition system. I’ve decided to use a vapour blasted empty competition magneto case I’ve had for donkey’s years and hide a Boyer electronic ignition in there. (Only you and I will ever know). The rebuilt head will go on the engine when it is in the frame, this saves a bit of weight when lifting. Health and Safety and all that! Talking of the head, stood upside down, petrol was poured into the combustion chamber with the valves in to check for leaks. The results proved acceptable.
Fred Williams provided me with an original 1957 on front mudguard with bridge. Also four stainless spacers I didn’t know about, that go between the front mudguard and stays. I’m keeping the stays in polished stainless, (Will match the polished stainless rear grab handles) this and 12 volt + electronic ignition about the only deviations from standard. Oh, and the new folding kick start. I’m hoping that I will be able to have the mudguards powder coated in Dove Grey (GR31) The trial fit is almost over.
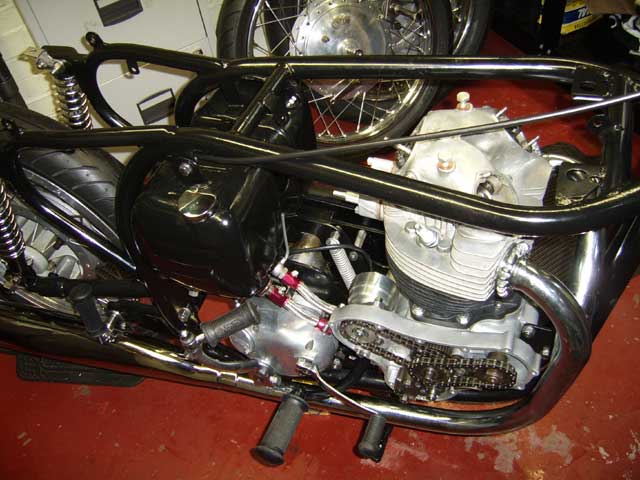
Note the spare empty engine cases; I use these simply because when the engine plates and frame have been powder coated, it is very tight to make the cases fit. The last thing you want when trying to slot a heavy engine in there, bad enough with a pair of empty cases, believe me.
With the empty cases in position and the whole thing tightened up for a month or so the engine should slot in without too much trouble, come the day. Like the mudguards, the trial fit is essential.
I have put aside two gallons of BP Ultimate, the most (Petrol) one is legally allowed to store in a shed or garage within a certain distance from a dwelling. I bought this petrol on the last day of March, after the April fuel scare. No word from BP to date if they have added Ethanol to Ultimate. If they have then this is going to cause big problems.
Another problem is that the front wheel does not turn when the spindle nut is tightened. Sods law is that I’ve had this problem before but thought it was a one off and so never noted the cure. Part five will be an opportunity to record that information.
The original pushrods were going to be used but the tip of one was damaged and so a new set were bought from RGM in Cumbria. Still, the crank and main bearings were found to be in excellent order and will be reused but with new shells. Italian std piston rings have been used when I gave up looking for a set of Hepolite rings. The gearbox was rebuilt with new bushes, seals and bearings over a year ago. Best to use the superblend layshaft bearing with any Norton over 500cc, though a good idea anyway.
The valve guides were in good order after powder coating but the springs and valves are all new. Another deviation from standard is the new RGM rocker spindle cover kit. Finally, with regard to the head, one of the rockers at the tappet contact point was slightly worn and needed slight attention.
Each fork leg has 200 cc of 15 weight fork oil, this has been in the forks, on the bike for several months now and not a drop on the floor, so that is a job completed. This is the set up I have on my slimline Model 50 and the damping is superb.
Still quite a bit to buy, the electronic ignition and exhaust system going to be the most expensive parts but the little bits are going to add up. There will be the horn, rear brake light switch front brake and clutch levers, (5/8ths) horn / lighting switches, A new Amal mono block carburettor, a throttle, some of the tool kit and some slosh (one part tank sealant that is Ethanol proof) The mudguard vapour blasting and tank painting black and dove grey will also cost a few pennies. Better get saving!
1960 Norton Dominator 99 (600cc) Part 5
Well, July came and went so I guess an update is due and this will turn into a six part saga or should I say restoration diary.
There have been a few changes along the way and so perhaps first I should consider them. To save money I have decided to use a new 28mm Mk 1 Amal I already had for a Norton 500cc twin engine I have. All I needed to do was to change the main jet from a 200 to a 240. I can always fit a mono block later.
The electronic ignition inside an empty magneto body has been put on hold for now, I have decided to go with the trusted Boyer magneto conversion to help speed things up a bit. I have one on the 650 but also well tried in my Poor Man’s Manx.
The front wheel not turning when the spindle was tightened was down to the after market dust cap. Thankfully a friend made two in stainless when he built his bike, copied from an original. Now all is well in that the wheel turns freely with the spindle secure. In fact there is nothing to stop the wheel from turning at the moment as the new front brake cable I bought has an inner a little over two inches too short!
I managed to have the Mudguards powder coated after all and at a very reasonable price. I found that RAL 1013 was an excellent match for Dove Grey, see what you think? Thank you Yorvik Engineering.
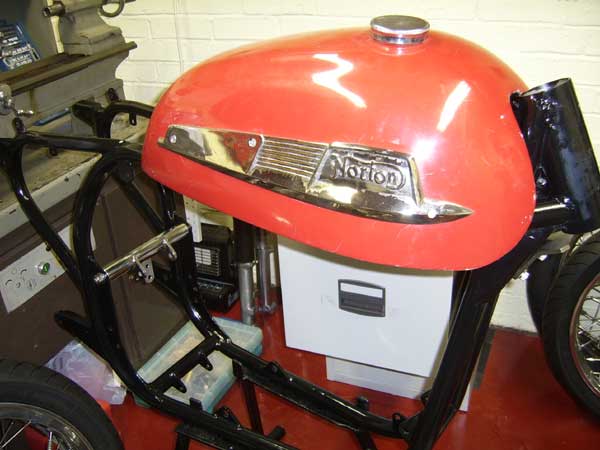
The petrol tank will be painted gloss black and dove grey (RAL 1013) but I’m thinking that I perhaps won’t seal the inside of the tank. I came to this conclusion because nobody told us that Ethanol was to be added to petrol, not even stake holders FBHVC and we found out when damage started to occur. So, what happens if eco nut jobs start experimenting with other bio chemicals in the future and not bother warning us? It’s not an easy job getting sealant out of a tank so I may hold fire, we’ll see. Still on the tank, the right hand badge was stuck on due to two of the 3BA screws broken off. Once I manage to get these out and tap out the holes the tank will be chemically stripped and etched primed, then over to the painter. I also need to find a good chrome plater for the badges. I don’t know if Prestige, near Barnsley are still on the go but they certainly did a decent job for me before. Processes such as plating will eventually become illegal through EU law and so the rush is on. In fact all businesses have to be carbon neutral by 2019 so many will be out of business anyway! Do we actually vote for such policies?
An old seat I have fits perfectly but the seat I had made needs quite a bit of work doing to it, to make it fit, sods law.
Anyway, it’s almost all there now, less a front brake cable that fits and a rear brake switch. I was pleased to see that the exhaust system I bought from RGM was made in Birmingham. I just hope it doesn’t foul the primary chain case as in one local example I saw. The brake and clutch levers are old Dominator parts while the throttle and grips are new genuine Amal items.
The next update will be the last on the 99, other than a note on how it’s going, might be a nice Christmas present? Then at long last it will be time to take the 650 motor apart to find out what is rattling in the engine, I fear it will be a big end job but it will be a fantastic bike once the engine is sorted.
But it won’t even stop there but that’s another story, should I live that long?
1960 Norton Dominator 99 (600cc) Part 6 (The final bit)
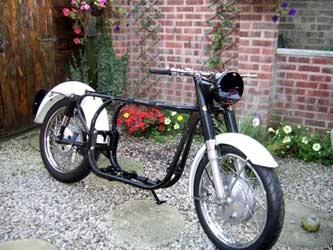
Well I thought the bike might be finished by the Christmas before last but in fact it was sort of finished during August 2015, well, up and running and MOT’d but it took until December before the DVLA were able to match my MOT to the machine so I could (free tax it). If it were my only bike I could have just spent the money and had another MOT but all was well in the end. Also, with the help of the Norton Owners Club I was able to preserve the original registration. Although I had the last tax disc from 1975 the DVLA no longer accept these as one of the two pieces of evidence. I had the green continuation log book and was I glad I took a couple of photos of the bike I pushed into the shed in May 2010, awaiting restoration and a stack of new and restored parts. The tattered old number plate with stick on letters sufficed for this purpose.
Running the engine for the first time proved very satisfactory for a few moments and then a clatter from the top end, easily identifiable. Rather than switch off, I took the oil filler cap off and could see the oil returning, I then put a finger over the return pipe, sending, no foecing oil to the rockers and the noise soon stopped, never to return. (To date) Just a matter then of some minor carburettor adjustments with a small screwdriver and the 99 was running to perfection. The smoothest and quietest Norton twin you ever did hear or ride!
The first rides, being winter, were short but found two issues. The first was the restored Smiths 120mph chronometric speedo I bought on Fleebay was working intermittently. The problem was with the needle while the miles continued to clock up. A friend had good service from repairer, Phil Woods in Sussex and so I sent my instrument to him and he diagnosed a loose needle, otherwise all was well. While I was at it I exchanged an old speedo the same, for my pre F/bed Model 50 currently under restoration but that’s another story. The other issue, easily fixed was the brake light switch, activating the brake light while sat on the bike, just a job of moving the switch pivot point back slightly. The Speedo that came with the 99 went on my 650 and never had an issue. Incidentally, the 650 has 458 miles on the clock as I write and has quietened slightly since changing from 20/50 oil to SAE40 but still a concern to the ear but goes well all the same. Could it be the rockers hitting the earlier designed head?
UPDATE - 2022
The 650SS has now covered more than 2,300 miles though not without some maintenance, though no breakdowns.
The bike has had a big end type rattle from the start that necessitated a partial strip down.
There were some witness marks found in the head and on the pushrods that were dressed. Since then the rattle has improved.
There were issues with clutch grab and the primary chain going very tight. I put this down to the gearbox lugs needing attention.
When the time comes to have the engine out for examination I will change the gearbox also and report findings.
I changed the carb for a new Amal Mk 1 930 (Set up as per Mercury) and now a first kick starter with 70 mpg and excellent performance.----------------
My friend Ian did a lovely job of painting my spare (Post 1964) tank in the correct colours and it remains on the bike. (Gloss black top and RAL 1013 bottom) This tank was coated with Wyldes Flowliner, donated for evaluation by the Late Les Wylde. Flowliner is ethanol resistant. I can’t say how effective this is because I go out of my way not to use ethanol but there are no leaks to date for certain.
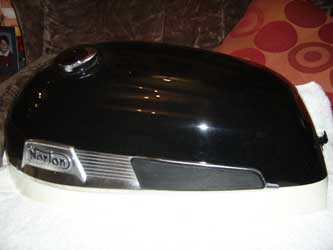
I said spare tank because the original 1960 tank has been painted by Garry Smith (York) who does an excellent job. The post 64 tanks have a narrower radius at the front, easily identifiable because the filler cap is on the opposite side. This tank was treated to a caustic bath to remove everything. (As was the tank Ian painted with aerosols) Thanks Russ and Tim at Yorvic Engineering. Tim noticed a few tiny pin holes near the back of the tank underneath and kindly brazed them up after he blew the tank out with an air line. Thankfully it was a warm afternoon and so I gave the tank five minutes with an old hair drier, kept for such purposes and rubbed down the surface rust with scotch pads, wiped it down and etch primed the tank before any more ferric oxide could appear. Once the whole tank was primed I left it for an hour before using another consignment of Wyldes ethanol resistant Flowliner. I later attached some old tank badges using 3BA screws so the line could be seen for the paint. I put in whitworth setscrews for the two front mountings and a ¼ BSP plug in the fuel tap position, all to protect the threads.
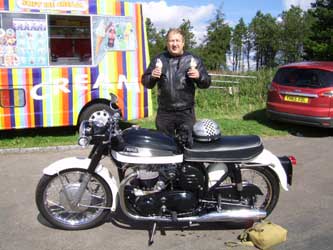
The tank now finished resides in the house, with its perfect paint job, new badges and filler cap and perfect inside too it’s just too good to use!On August Bank holiday 2016 I went on my annual ride to Whitby, after next year I’m not sure what I will do as all my road bikes will have made this run. Anyway, the 99 was going on its first ride outside the York outer ring road with less than 100 miles on the clock and just to make it interesting I rode the last 20 miles in the dark to test the electrics. The headlamp was a little dim though, I’m certain a change of bulb would improve things there. But generally the bike ran very well indeed, it didn’t use any oil as I could notice and fuel consumption worked out at 65 mpg, not bad with only 200 miles on the clock, a few more now. Starting was reliable and the same regime as my other Norton twins: From cold, full choke, tickle carb, E0 fuel on first of course, ¼ throttle and one or two kick will set the motor going.
Starting from hot is slightly more hit and miss but generally reliable: tickle the carb, always do that but give it 1/3rd to ½ throttle but throttle off as soon as the motor fires.The British made pipes are excellent and clear the primary chain case, unlike another I saw. The downside to me is that the side stand hits the L/H pipe on retraction, I’ll have to see about that.
Once again a big thank you for all those who made this project possible, this includes the late Les Wylde for vapour blasting the engine casings, rocker box and gearbox casings. Howard ,for putting the engine and gearbox together and a few other bits too. Ian for building the wheels (Hagon stainless rims and spokes) Yorvik Engineering (Tim & Russ) most especially for powder coating the frame / swinging arm, barrel, chain guard oil tank and battery box + lid. All in gloss black and the two mudguards in RAL 1013 (Dove Grey) RGM for the gasket set, Boyer power box and electronic ignition and other bits. The tyre man at Rufforth Autojumble for the new Avon Roadrunner 19” tyres and BOM battery’s for the gel 12V battery. NOC for the rear mudguard and Fred Williams for the correct front one.
I should also mention Mick Hemmings for his twin cylinder engine build video and finally to Dave Catton of the NOC for helping to secure the original registration number and confirming the colours the bike left the factory and finally the showroom in August 1960. The bike had generally been registered in the Darlington area and had only come a little further south where I bought it.
I bought the bike in May 2010 from an advert in Roadholder from a gentleman whose health was failing. Thanks then to Dave for taking me in his van to collect the 99 and all the boxes of bits that came with it. The bike will be ready for the 2017 season, hope I will be too?
Finally: Update April 2022.In October 2017 my 99 ran onto one cylinder. I made the decision to ride the 8 miles home on one pot, sticking mostly to main roads. Up to 50 mph was possible but no more. no perceived damage.
Changing the plug, plug cap and twiddling with the HT lead temporarily got things firing on both cylinders again.
I thought that was it, a bad connection but in September 2020 I got stuck in a steepish valley with no way out on one pot.
The same fix was applied with assistance and mobile again. The bike then ran intermittently on both pots.
Eventually in 2021 the fault was traced to a duff new Prince of Darkness faulty 6v coil. 12v but as per Commando using X2 6v coils.
I happened to have two old 6v coils and used one to replace the new duff one. After all that, it was a new coil!!! I'll keep the old one in, you can't see it under the seat and as they say: 'The old ones are the best.'That left just one final issue to fix. If the bike is left for more than a few days unused, on start up a puddle of oil would appear from the engine breather.
The answer was a modification via an extension to the breather pipe, with enough capacity to hold the ejected oil until it can be drawn back into the crankcase.Neil Wyatt - May 2022
An Ice cream break, 30 miles out, on the North
Yorkshire moors, well two ice creams actually!
Couldn't resist it. Two 99's with a 99.
(The one 99 had already been done)
Arrival at my intended destination,
just South of Whitby
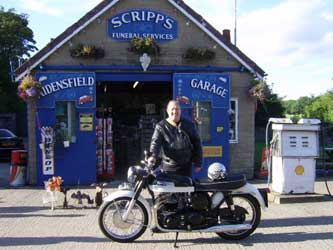
On the way back a stop off at a well known garage.
They ran out of ethanol free petrol
at least 30 years ago!
A tank just too good to use!


Neil's Norton Notes |